
MarkDwayne.com
Mark Of Marketing Blog
Mark Of Marketing Blog
Mark Of Marketing Blog Is All About Home Business Opportunities and Make Money Online Articles, Videos and More!
Creating an Effective HTML Squeeze Page from Scratch: A Step-by-Step Guide
Unlock the Power of List Building: Learn How to Create an Effective Squeeze Page and Grow Your Email List
Welcome to this tutorial on creating a squeeze page from scratch. In this training, we will walk you through the process of building a compelling opt-in form that will help you grow your email list. To get started, there are a few tools and resources you will need listed below:
The Email Marketing Tools You Need:
- Autoresponder: We recommend using Aweber or GetResponse.
- Website and hosting: Consider using a service like One and One for domain registration and hosting.
- Notepad or Notepad++: We suggest downloading Notepad++ for its added features.
- FTP server: FileZilla is a great option for uploading your code to your server.
The Steps To Get Started:
Step 1: Gathering the Necessary Tools
To begin, make sure you have an autoresponder and a website hosting service in place. These tools are essential for managing your email list and hosting your squeeze page.
Step 2: Setting Up Notepad or Notepad++
Install Notepad++ or use the regular Notepad software to create and edit your code. Notepad++ offers additional features that can enhance your coding experience.
Step 3: Obtaining FTP Server Information
Contact your hosting company to obtain your FTP server login information. You will need your host name, username, password, and protocol to connect to your server using FileZilla.
Step 4: Creating the Squeeze Page
Navigate to a website like example.com, right-click, and select "View Source." Copy the entire source code from the top to the bottom and paste it into your Notepad or Notepad++.
Step 5: Saving the Squeeze Page
Save the file on your desktop or preferred location. Name it something like "opt-in-test2.html," ensuring that you include "opt-in" in the file name.
Step 6: Customizing the Squeeze Page
Remove unnecessary div tags, links, and styles from the source code, leaving only the content you want to include on your squeeze page. Save your changes periodically.
Step 7: Adding Opt-In Form Code
Obtain the opt-in form code from your autoresponder service (e.g., Aweber or GetResponse). Paste this code into your Notepad or Notepad++ below the body tag.
Step 8: Uploading the Squeeze Page
Connect to your server using FileZilla and upload the saved HTML file to your website folder. Rename it as needed to fit your desired URL structure.
Step 9: Styling the Squeeze Page
To customize the appearance of your squeeze page, you can modify the background color, text color, and even add an image. Refer to resources like W3Schools for guidance on CSS styling.
Step 10: Testing and Refining
After making changes to your squeeze page's code or styling, upload the updated version to your server and test it in different browsers. Make adjustments as needed until you achieve the desired look and functionality.
FREE Report – Claim Your Affiliate Marketing Action Plan Here! <<<
Conclusion:
By following these ten steps, you have successfully created a squeeze page from scratch. Remember to continuously test and refine your squeeze page to optimize its performance in capturing leads and growing your email list. With your newfound knowledge, you can now create effective and engaging squeeze pages tailored to your specific needs. Happy designing!
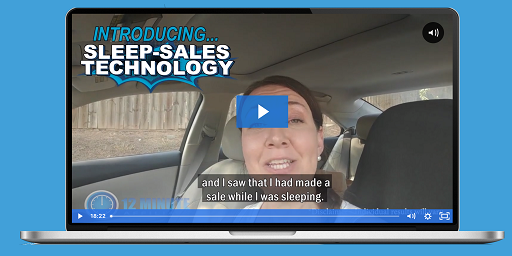
Remember, this blog post is a summary of Mark Dwaynes video, and for more detailed information, it is recommended to watch the complete training series on affiliate marketing provided by MarkDwayne.com.
Thank you for reading, and I look forward to sharing more with you soon.
Disclaimer: The views and opinions expressed in this article are solely those of Mark Dwayne and do not necessarily reflect the official policies or positions of Mark Dwayne or MarkDwayne.com.
If You Liked This Article and Was Helpful You May Want To Check Out My Other Article On The Basics of Email Affiliate Marketing A Step By Step Guide!
Related Links
How to Make Money on YouTube with Affiliate Marketing
The Role of AI in Today’s Affiliate Marketing: Revolutionizing the Digital Landscape
The Role of GPT in Today’s Affiliate Marketing
9 Strategies Used by Successful Affiliate Marketers
Standing Out in the Affiliate Marketing Crowd: Turning Nothing into Profits
Affiliate links are used on this page and we are a paid affiliate.